Como fotografiar la aurora
Suena muy fácil, fotografiar auroras. Ves algunos colores en el cielo, apuntas tu cámara y haces clic, tienes una foto. Lamentablemente, no es así como funciona. En este artículo, descubrirás cómo puedes volver a casa con increíbles imágenes de la aurora que durarán toda la vida.
Equipamiento
Todo comienza con un buen equipo, sin importar en qué latitud se encuentre. Si crees que puedes hacer fotos con tu teléfono móvil o cámara compacta, entonces tenemos que decepcionarte. Eso no funcionará. No verás la aurora en tus fotos. Los sensores en estas cámaras simplemente no son lo suficientemente sensibles. Necesitará al menos una cámara de sistema o una cámara réflex digital de lente única (DSLR) que tenga un modo manual completo (M) y pueda colocarse en un trípode. Se necesitará el trípode porque las auroras necesitan un tiempo de exposición relativamente largo. No tome fotografías sin un trípode, las imágenes saldrán borrosas debido al movimiento de sus manos. Los tiempos de obturación pueden variar mucho de solo 1 o 2 segundos para auroras brillantes, hasta 30 segundos para auroras débiles que son casi imposibles de ver a simple vista. Un poco más sobre esto en el artículo. Cuando se trata de lentes, se necesita una lente gran angular sensible a la luz. Una lente ideal para la fotografía de auroras sería, por ejemplo, una lente f2.8 de 11 mm. Un accesorio opcional que puede considerar es un control remoto. Con un control remoto puede tomar fotos sin tocar la cámara. Esto evita las vibraciones que de otro modo verás en tus fotos. Si no tiene un control remoto, ¡no hay problema! También con el disparador automático puede tomar excelentes fotografías sin tener que tocar la cámara.
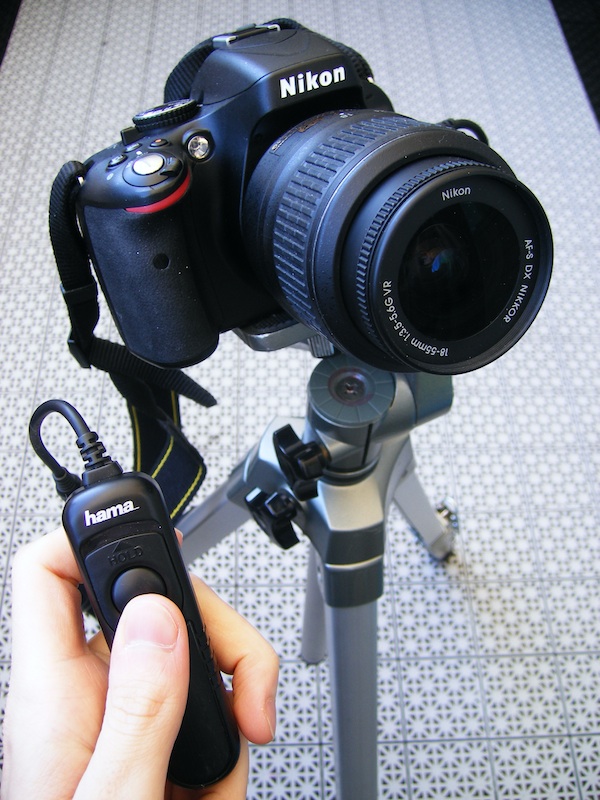
Imagen: Una DSLR con una lente gran angular sensible a la luz, montada en un trípode con un control remoto con cable.
Tiempos de exposición
The exposure time for a satisfying exposure can vary widely. Sometimes 3 seconds is enough to capture all the shapes and structures that form the aurora but it could also take up to 30 seconds depending on the brightness and activity level of the aurorae. Try to make multiple pictures with different exposure times to see which photos gave the best result. The average exposure time for a good picture of the aurora is about 20 seconds when using an ISO value of 400 during high auroral activity with a fast lens. When using ISO values higher than 1600, the pictures will contain more noise and that degrades image quality, so try to avoid using high ISO settings when possible. A low ISO setting of 200 or 400 often give the best result with minimal noise in your pictures but you might need longer than desired exposure times with these settings. Play around with the settings and see what works best in your situation. Every situation is unique!
| Valor de apertura | 64 ISO | 100 ISO | 200 ISO | 400 ISO |
|---|---|---|---|---|
| 1.4 | 35 seg. | 25 seg. | 12 seg. | 6 seg. |
| 1.8 | 60 seg. | 40 seg. | 20 seg. | 10 seg. |
| 2 | 60 seg. | 45 seg. | 25 seg. | 12 seg. |
| 2.8 | 2 min. | 90 seg. | 45 seg. | 25 sec |
| 4 | 4 min. | 2 min. | 90 seg. | 45 seg. |
Consejos generales y pautas para las altas latitudes
What is it all about when it comes to photographing the aurora? We have the gear now but what else do we need to think about before we can start making pictures? It is pretty easy to divide it into 3 categories: the weather, your location and geomagnetic activity. Enemy number one is the weather. Is there bad weather and clouded? Bad luck. You won't be able to see aurora trough the clouds. Don't give up that fast and always keep an eye on the sky because if the clouds start to break up, then there might be a chance to see a glimpse of the aurora. So don’t hang out in that sauna all night! Another important aspect is of course your location: unless you're on Antarctica, this rule applies: the more north you are, the better. For Europe a general rule is that as soon as you're above the arctic circle you will have a good chance to see some auroras even if the Earth's magnetic field is in a quiet state. There will always be moments that the aurora will show up at such high latitudes. Another thing to consider is that you'll need to find a place that is as dark as possible (away from city lights) with a clear view towards the northern horizon. This is especially important when the Earth's magnetic field is quiet. When the space weather is quiet, the aurora can be so weak that it actually resembles a cloud for the untrained eye. If you're not 100 percent sure what you're looking at in the sky, Take your camera and make a picture. Does the "cloud" look a bit greenish on the picture, then you are looking at very weak aurora. If there's a coronal hole active or if you're witnessing the arrival of a coronal mass ejection; in that case you're lucky! When the space weather conditions are right (see our other articles) then intense and active aurora will be visible in a great part of the sky. These auroras can even be right above you or also on the southern part of the night sky!
So, this sounds promising already! Of course you want to capture all of this with your own camera, so we will provide you with the some useful tips and tricks. The settings you're going to use is something you will have to experiment with yourself. There is no golden rule or settings that are always going to work. What you'll always have to do is putting the camera on a tripod with the remote control (if you have one). Turn off autofocus on your lens and put your camera in manual (M) mode. Set your aperture to the lowest possible value and for zoom lenses make sure that it is set to the widest possible field of view. If your camera and/or lens comes with image stabilization then it is wise to turn this off. When it comes to finding the perfect focus for your lens then try focusing on the stars or another object in the distance. If you're not 100 percent sure what the optimal sharpness of your lens is? Practice this by taking a picture of the stars or the horizon. Look back on the computer if the pictures came out nice and sharp. No computer around? Go on your camera to the picture viewer and zoom in on your picture to see if it is in focus or not. When it comes to the aurora, it can come in many shapes, colours and intensity. During quiet geomagnetic conditions it can be very static and weak. You might have to raise the ISO values and/or increase your exposure time. Decide for yourself what you think is an acceptable ISO setting for your camera. You can use shorter shutter times with a higher ISO value but this will also add more noise to your pictures. How this noise looks like and the amount of noise you'll get is different for every camera. Play a bit with this and decide for yourself which ISO setting you find acceptable.
When the aurora is very bright and energetic, a shutter speed of only one or two seconds could already result in a satisfying picture. However, when the aurora is weak, it might happen that you will need an exposure of 20 or even 30 seconds to get a decent result. Do note that auroras move! You might lose some detail during long exposure times because of this. These movements are usually rather slow but you'll notice that during long exposure times a degradation of the details in the aurora. During moderate geomagnetic activity the degradation of the details can already occur after more than 5 seconds of exposure time.
¿Vas a una persecución de auroras en la temporada de invierno? Hay algunas cosas adicionales a tener en cuenta. Debido al frío, tu batería durará un poco menos de lo que estás acostumbrado. Considere comprar una segunda batería, especialmente si planea quedarse afuera durante mucho tiempo. Mantenga esta segunda batería cerca de su cuerpo para mantenerla caliente. ¿Estás poniendo tu trípode en una superficie con nieve profunda? Asegúrate de que las patas no se hundan en la nieve. Sería una pena si notaras que tu trípode se hunde suavemente en la nieve y terminarás con una foto sesgada.
So what are the best times during the night to photograph the aurora. It all depends on the geomagnetic activity but most of the time the best times to photograph aurora during the night is from 10 'o clock in the evening to 1 'o clock in the night but it can also show up much earlier or later then these times. During a geomagnetic storm it might even be possible to see auroras from sunset to sunrise. No date planned yet? Consider going around the equinox. For unknown reasons, aurorae are more common around these two times (21st September and 21st March).
El último y quizás el mejor consejo que tenemos para ti es: ten paciencia. Las auroras van y vienen. Si no hay nada que ver, no temas. Podrían aparecer de repente 5 minutos después. No se decepcione cuando no haya nada que ver, siempre habrá un momento en que aparecerá. ¡Quédate alerta!
Fotografiando detalles de la aurora y estructuras en las altas latitudes
Los verdaderos fotógrafos aficionados quieren ir un poco más lejos cuando se trata de fotografiar la aurora. Por supuesto, desea prestar atención a las formas y estructuras de la aurora, pero cuando combina esto con un bonito primer plano, le dará una dimensión adicional a sus imágenes. Aquí hay algunos consejos!
To have the best chance at capturing all the fine details and structures of the aurora, it is wise to photograph from about half eleven in the evening to midnight. This time frame will be your best bet at photographing some nice auroras because the auroral oval reaches it's maximal extent. Keep in mind to give attention to the foreground in your frame. Try to frame in some interesting objects or landscape to enhance your photo and avoid capturing street lights as they could overexposure your picture and wash out the aurora. To not disturb your night vision use a red lamp. Before you go outside it is wise to have your camera cooled down a bit already so the lens doesn’t fog up which will result in bad pictures.
When you see the bright arches that form the aurora, you open the shutter of your camera by using your remote control and lock it in case you shoot in BULB mode. Set your camera to the lowest possible f-value (aperture value) to keep the exposure time as short as possible. If the aurora moves much then it is important to not expose your picture too long because this will cause loss of detail and even blur the aurora. As you can see: photographing the aurora is a real challenge but it can result in pictures that everyone will enjoy!
Consejos y pautas generales para las latitudes medias y bajas
Para las latitudes medias, y especialmente para las bajas, es mucho más difícil capturar auroras. En primer lugar, los parámetros del viento solar y el campo magnético interplanetario (FMI) deben ser tan favorables que el óvalo auroral se desplace lo suficiente hacia el sur. Las latitudes medias bajas necesitan un valor de Kp global de 7 para que las auroras aparezcan en el horizonte norte. Durante tormentas severas (Kp8 y Kp9) será visible más arriba en el cielo nocturno del norte y podría aparecer incluso justo encima de usted. Esto, por supuesto, depende de su ubicación y la intensidad, pero es una ocurrencia muy rara. Las latitudes bajas necesitan al menos Kp8, pero se prefiere Kp9. ¿Se está desarrollando una tormenta geomagnética? Entonces vigile los magnetómetros. Para los espectadores europeos, utilizamos el magnetómetro Kiruna (Suecia, Europa) para saber cuándo las posibilidades son más altas. Un buen consejo para el magnetómetro de Kiruna es que tan pronto como el componente X muestre una desviación de 1300 nT, será posible ver una aurora en las latitudes medias bajas de Europa. Para la aurora fotográfica ya es posible cuando Kiruna muestra una desviación de 700nT. Las auroras fotográficas son tan débiles que son imposibles de ver a simple vista. Este tipo de aurora será de color rojo. Una cámara es muchas veces más sensible que el ojo y captará esta luz mucho antes que nuestros ojos. Cuando se cumplen todas estas condiciones, es importante estar en un lugar lo más oscuro posible, con cielos despejados. Especialmente hacia el norte, porque allí es donde aparecerá la aurora. Asegúrese de que no haya ciudades o pueblos hacia el horizonte norte. La contaminación lumínica puede parecerse un poco a la aurora que estamos tratando de capturar, así que asegúrese de que el horizonte norte esté libre de contaminación lumínica. Lo último que desea es volver a casa con imágenes que solo muestren contaminación lumínica. Este brillo se mostrará muy brillante en sus imágenes debido a los largos tiempos de exposición. Si hay alguna aurora, la contaminación lumínica los dominará, ¡así que tenga mucho cuidado al elegir su ubicación!
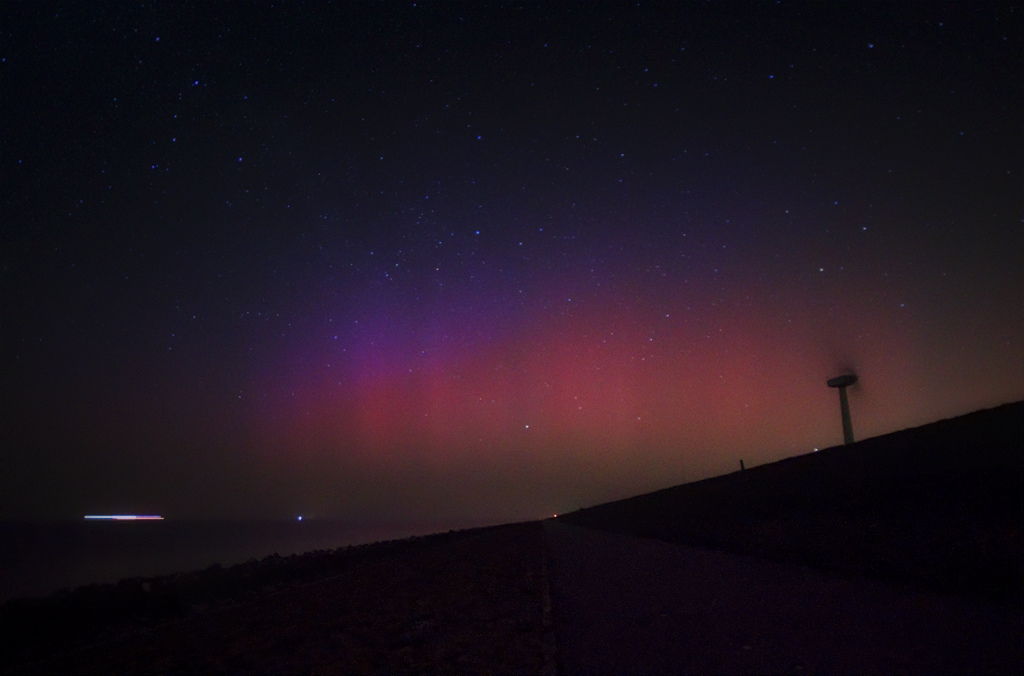
Aurora visible desde los Países Bajos el 15 de marzo de 2012. Kiruna mostró una desviación de 1250 nT y eso fue suficiente para que Ide Geert Koffeman la capturara.
Últimas noticias
X1.1 solar flare with earth-directed CME
Sunspot region 3615, G1 watch
X6.3 solar flare
Últimos mensajes del foro
Apoye a SpaceWeatherLive.com!
Mucha gente viene a SpaceWeatherLive para seguir la actividad del Sol o previsión de aurora, pero con esta cantidad de tráfico se incrementan los costos del servidor. ¡Considere hacer una donación si disfruta de SpaceWeatherLive para que podamos mantener el sitio web en línea!

Hechos clima espacial
| Último evento clase X | 2024/03/28 | X1.1 |
| Último evento clase M | 2024/04/19 | M1.0 |
| Últimas tormentas geomagnéticas | 2024/04/19 | Kp7 (G3) |
| Días sin manchas | |
|---|---|
| Último día sin manchas | 2022/06/08 |
| Promedio de manchas solares mensuales | |
|---|---|
| marzo 2024 | 104.9 -19.8 |